Author
Noorez Khamis

PowerPoint design and presentations have been a major part of most of our work lives for quite some time now. However, not everyone is leveraging this powerful corporate presentation tool to its fullest. For designers, it’s often a frustrating environment, where Photoshop and other Adobe software feel more like home. A great way to build an amazing presentation is to feel like you have a good grasp on what the tool can do, and how to set it up so it’s efficient and effective. Working fast also means saving unnecessary clicks and optimizing your workspace. Here are a few tips to make that happen with the Quick Access Toolbar. In this article, I will walk you through my own Quick Access setup, as a marketer and graphic designer, and how it helps me be more efficient.
Customizing your Quick Access Toolbar in PowerPoint
Why should you care about customizing your Quick Access Toolbar? It’s true that most of the good settings are in the Home tab of the ribbon, but if you travel a lot between the tabs, isolating the functions you’re trying to get to and making them accessible in 3-4 clicks can save you a lot of time slide after slide.
The quick access toolbar doesn’t budge. It’s always there, no matter what you got yourself into when clicking the ribbon. No more looking for elusive functions you can’t remember where you saw, either. By default, the Quick Access toolbar is located at the very top of the window and only has a few options.
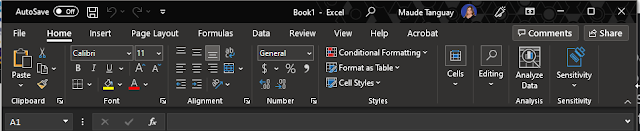
It’s the itty bitty space where you see AutoSave, Save, Undo and Redo in my Excel window, below:
Now, if you click that little white down arrow next to the Undo button, you’ll get this:
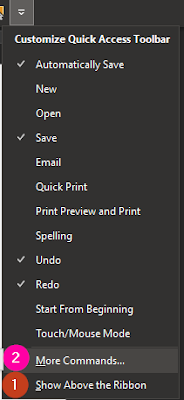
First, I recommend showing the toolbar below the ribbon. Mine already is, so that’s why the screenshot says Show Above the ribbon.
<pclass=”separator”>
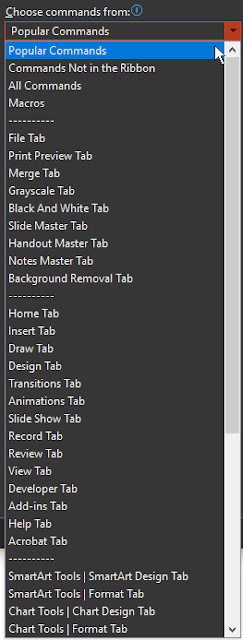
Don’t forget to check the dropdown window at the top. It’s where you’ll be able to locate the settings you’re looking for beyond the “Popular Commands” category. It follows the ribbon you’re used to.
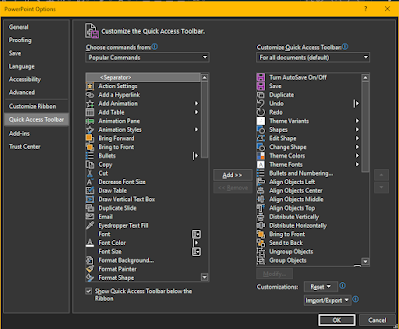
When customizing your Quick Access Toolbar, take a minute to think about which tools you use the most often when you work in PowerPoint.
This is my final result:

- I kept the saving options because they are useful.
- Then, we have the duplicate slide option. I often use copy/paste for design, so I don’t want to have to lose my copied element by copy/pasting a slide if I need to.
- After comes our Undo/Redo combo. And then, the custom party begins.
- Theme Variant
- Shapes
- Edit Shape
- Change Shape
- Theme Color
- Theme Font
- Bullet and Numberings…
- Align Objects Left
- Align Objects Center
- Align Objects Middle
- Align Objects Top
- Distribute Vertically
- Distribute Horizontally
- Bring to Front
- Send to Back
- Ungroup Objects
- Group Objects
- Alignment
- Center Vertically
- Outline Weight
- Graphics Fill
- Graphics Outline
- Guides
- Gridlines
- Pick Up Style
- Apply Style
- Slide Master view
- Close Slide Master view
- Insert Pictures
- Transparency
- Colour
- Corrections
- Crop Tools
- Format Background…
- Hide Background Graphics
- Animation Pane
- Display the Selection Pane
Theme variant
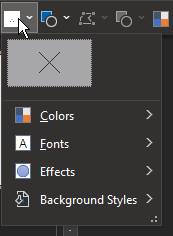
Here you’ll find all the different variants for Colors, Fonts, Effects and Backgrounds style. I have 1 different colour theme saved for each brand I work for or work with. That way, my default colours are always the ones I need. I do the same thing for fonts.
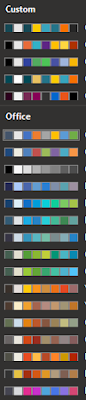
This is my saved Colors, at the top. It’s easy to switch from one brand guide to the other when you have the options saved and one click away.
Shapes
The option is found under Insert > Shape. It … adds a shape.
Edit shape
The option found under Shape Format is only visible when a shape is selected. It gives you access to the selected shape’s endpoints and you can edit the shape for your needs. Think Pen tool or Illustrator.
Change shape
The one is also found under Shape Format when you have a shape selected, but then it’s usually hidden under the Edit Shape button. It’s useful if you decide you want to make your rectangle a circle in one click.
Theme color
Same as the option in Theme Variant, but 1 click closer.
Theme font
Same as the option in Theme Variant, but 1 click closer.

Bullet and numberings…
This version opens up the bullet and numbering dialogue box, as indicated by the “…”. I personally like to work directly from the dialogue box for these because you can customize them a little more from there. Customizing your bullet points to match your brand guideline is one super fast way of elevating your presentation design.
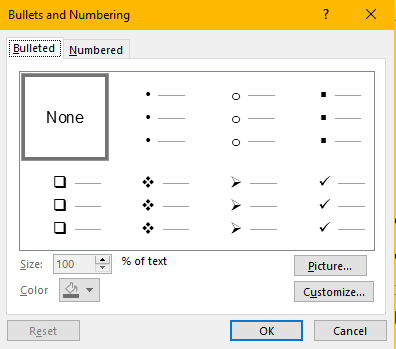
Change the color, but try to go beyond the usual culprits, too! Put an icon or an image. A part of your logo, maybe?
Align objects left | align objects center | align objects middle | align objects top
These do exactly what they say. With these 4, 90% of your alignment needs are covered. PS. If you select only 1 object, it will align it to the slide. 👍
Distribute vertically | distribute horizontally
These are very flexible and powerful tools. If you select 1 object, it will center it vertically or horizontally. If you select multiple objects, it will go from the higher (or most left) element to the lower (or most right) element.
Bring to front | send to back
Will bring a selected object(s) on “top” of others or at the back of the pile. This is similar to how layers work in photoshop if layers were only used to stack objects.
Ungroup objects | group objects
I ungroup more often than I group, that’s why I order them this way. I will often group a lot of things together, then when it’s time to tidy my design and align things properly, I’ll ungroup my general sections down to basic elements and then refine their alignments together.
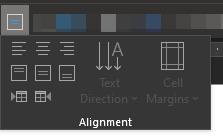
Alignment
Similar to the alignments mentioned above, but for text. It has the text horizontal alignment, vertical alignment, cell, and text direction. Very useful.
Center vertically
No big surprises here, but I like to have this one even 1 click closer to the options above.
Outline weight | graphics fill | graphics outline
Another set of options that’s usually only accessible when you have a shape or graphics selected. For my use, these options are too often used to be hidden away in a contextual ribbon tab.
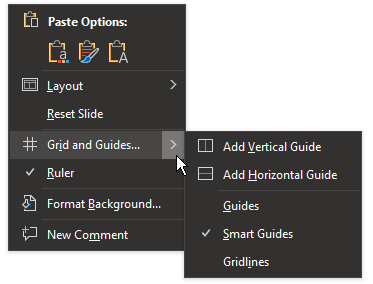
Guides | gridlines
These two are checkboxes to show or hide your guides and gridlines. You can customize the grid and add a guide by right-clicking in your slide and choosing the Grid and guides… option. Click on the words to access the dialogue box or click the arrow to add guides.
Pick up style | apply style
Another little-known one, but oh so helpful. You know, when you want all your text boxes to be the same, so you use the format painter tool? Pick Up Style does the same trick, but it holds it. And you can apply it with Apply Style as many times as you want until you pick up a new Style in the same presentation session.
Slide master view | close slide master view
If you don’t know what the Slide Master is, just know that it is where you can build a template to reuse and set a style that will apply to your whole presentation. I like to think of it as an InDesign for Dummies.
Insert pictures | transparency | color | corrections | crop tools
This is my image edition subsection. I think the functions are pretty self-explanatory again.
Format background… | hide background graphics
In this background subsection, use the Format Background… to toggle the background pane on and have access to all the background options you could need:
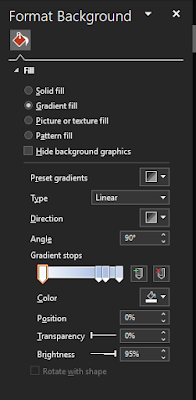
Hide the background graphics is a checkbox that allows you to hide everything that came with the slide template and are only editable in the Master View. By ticking this box, you’ll hide everything that came with the theme. It’s useful for editing non-standard templated slides or when you need to start from a black slate but keep the layout of a slide.
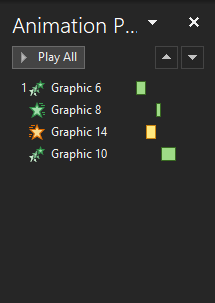
Animation pane
This option will open the right animation pane. I don’t often use animations, but when I do I like to control their flow and sequence, so this pane is very useful to get all up in the details.
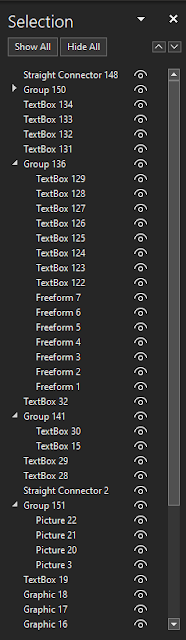
Display the selection pane
This pane is so simple, yet so useful, especially when you are used to environments like Photoshop. If you’ve ever wished you could select multiple objects, and hide them for a second so they’re not in your way, or locate one of the background elements you’re having issues selecting, this is your holy grail. It works like the Layer window in Photoshop and lets you hide or select items and groups.
Like most things, taking the time to set up your environment can have a massively positive impact on your productivity, wellbeing and overall engagement. By having access to your most frequently used tools at a single click, you’ll end up saving time you can use to do other things! Adopting technologies to their fullest is a great way of being more efficient and effective.
Want to learn more about our leveraging Microsoft 365 in a productive way and learn more about little changes that can boost your productivity? Take a minute to grab your copy of our business transformation eBook and learn more about how employee experience empowers workforces to be more productive, where and why you’re losing efficiency and time and how to turn the numbers around and leverage the latest methods and tools to improve productivity.