Author
Noorez Khamis

Were you ever worried about who has permission to see sensitive information stored within the company’s database? Nowadays, a business’ data has evolved from being stored in traditional files and cabinets to being fully on the cloud. With the Implementation of Microsoft Power Platforms including the Dataverse, keeping your business’ online data safe has never been more essential for security.
What is the Dataverse?
You may be wondering what the Dataverse is. The name may sound intimidating but don’t worry, it’s not complicated! The Dataverse is one component of Microsoft’s Power Platforms where it lets users securely store and manage a business’s data. Information within the Dataverse is stored in rows and columns, where each column holds specific types of data such as age, salary, date, etc. This allows the information stored to be neatly organized, which allows the integration of other Power Apps to create applications using that data! Another advantage is the data being stored in the cloud—allowing convenient access to share data with anyone in your business.
Why column-level security?
You might have been spooked when reading that sensitive information could be shared with anyone within the company, but don’t worry! Dataverse has many security features built in to help protect the sensitive information stored. One way you can keep your information secure is by implementing column-level security—the automation processes that require certain fields/columns to have a higher level of security. Not only does column-level security help protect sensitive information, but many business automation processes will also require certain data fields/columns to have a higher level of security. This step-by-step guide will cover how to enable a field for field-level security and how to create a field security profile.
6 Easy steps to implement column-level security in Dataverse:
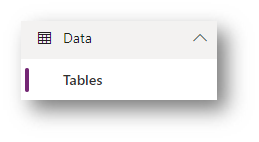
Step 1: Select tables
- Open up PowerApps > Navigate to Data > Select Tables.
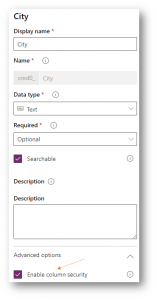
Step 2: Enable column security on the Dataverse table
- Select the Dataverse/CDS table that has a field you would like to enable Field Security on.
- Select the column/field.
- Under Advanced Options > Check “Enable column security”
Step 3: Select advanced settings
- Ensure you save the table.
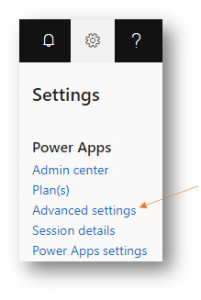
- Click the Gear Icon at the top right of the screen and select “Advanced Settings”

Step 4: Select Security
- Click the Settings Down Arrow and select “Security”

Step 5: Configure Dataverse field security profile
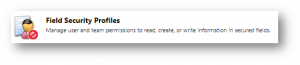
- Then select “Field Security Profiles”
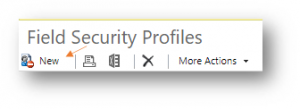
- Click on “New” at the top left of the screen.
- Give your Field Security Profile a name and description. *You have to save the first time configure the settings.
- After saving, Click “Field Permissions”
- In the list of fields, select the field that you enabled for field-level security.
- Now you can set three options:
- Allow Read – allows users assigned this profile the ability to view this field.
- Allow Update – allows users assigned this profile the ability to update/change information in this field.
- Allow Create – allows users assigned this profile the ability to create/add information to this field.
You may need to create multiple profiles for the same field in case users need different permissions. (E.G. some can only view and others can update/create.
Step 6: Update Dataverse profile permissions
- Once you set the permissions you will need to assign this profile.
- There are two methods for assigning the profile:
- Users: This method allows you to add users to the profile.
- Teams: This method allows you to add teams to the profile. *This method is great if your teams are well-maintained and minimize administrative management.
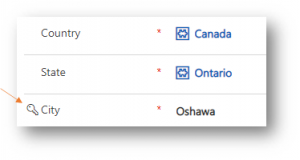
When you use the field in a Model-Driven App form you should now see a lock next to the field:
Just like that, if you’ve followed the 6 simple steps mentioned, your business’s data should be properly secured, with information being allowed to be read, updated, and created by only those that you approve. But wait! Just like how you’ve just made your Dataverse more secure, keep your business informed and up-to-date with the latest cybersecurity plan, and minimize the risk associated with the most common cyber threats in our free ebook!