Author
ali.razmi

As the holiday season approaches, Marcus Buckingham’s wisdom on enhancing team performance becomes even more pertinent, emphasizing the significance of weekly check-ins focused on near-term future work. This approach not only allows direct reports to prioritize their tasks for the holiday season but also ensures clarity on their responsibilities, reinforcing the manager’s support during this hectic time. While weekly conversations are ideal, Power Automate offers a solution for asynchronous work or busy schedules by facilitating the setup of a weekly check-in workflow. For managers seeking to foster a collaborative and supportive environment during the festive period, Buckingham recommends posing two key questions to direct reports on a regular basis:
- What are you working on this week?
- How can I help?
In this blog, written by Corrie Haffly, Development Team Lead of Creospark, we’ll guide you through the festive process of setting up a weekly check-in workflow with Power Automate.
Setting up a weekly check-in workflow
If you have an E3 license and access to Power Automate, you can set up a simple Power Automate workflow that is free to run.
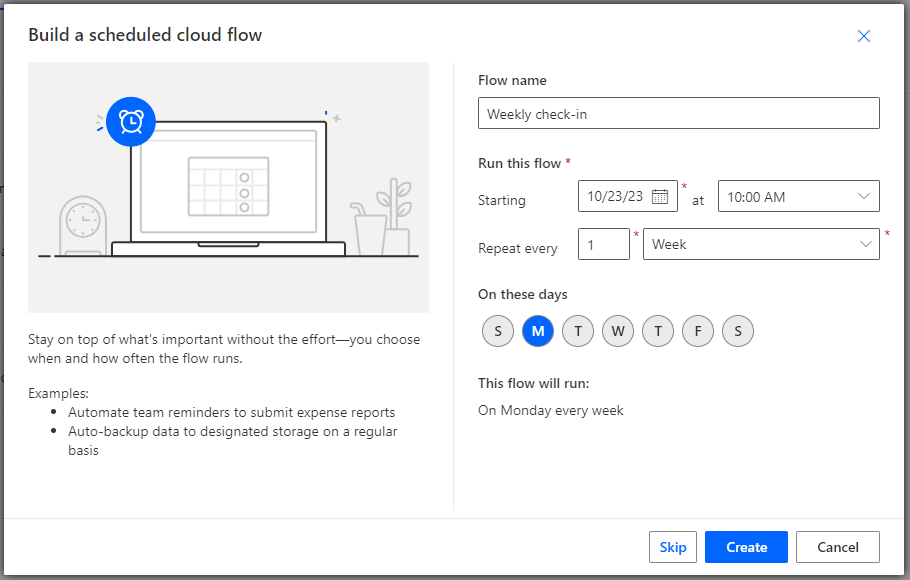
First, go to https://make.powerautomate.com and click New flow > Scheduled cloud flow.
Name your flow, e.g., “Weekly Check-in,” and schedule it to start every Monday at the beginning of the workday, repeating weekly.
To create a way to loop through your direct reports, we’ll hard-code their emails into a variable. There are lots of other ways you could set this part up, including connecting to a SharePoint list or Excel spreadsheet somewhere, but we’ll keep it simple and contained within this personal Flow.
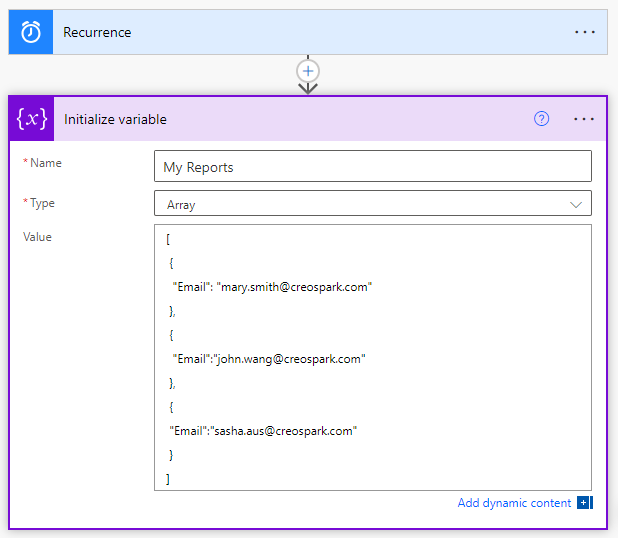
Click the New Step button, and search for “initialize variable,” then click to choose that action. In the Name field, type “My Reports.” For the Type field, choose “Array.” For the value, put in an array of JSON-formatted objects. Highlight your code and copy it, as you’ll be using it again in the next step.
[
{
“Email”: “mary.smith@creospark.com”
},
{
“Email”:”john.wang@creospark.com”
},
{
“Email”:”sasha.aus@creospark.com”
}
]
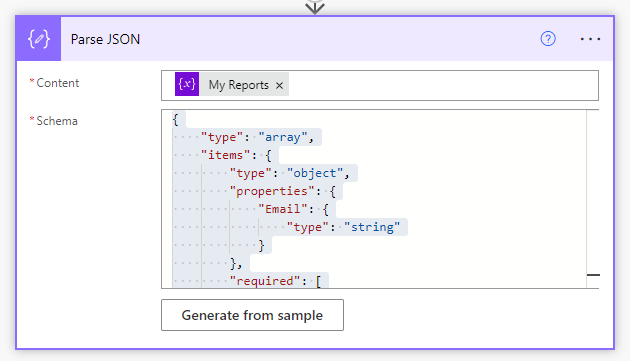
Click “New step” to add another action, and search for ”Parse JSON.” In the Content field, click the Add dynamic content link and choose the My Reports variable.
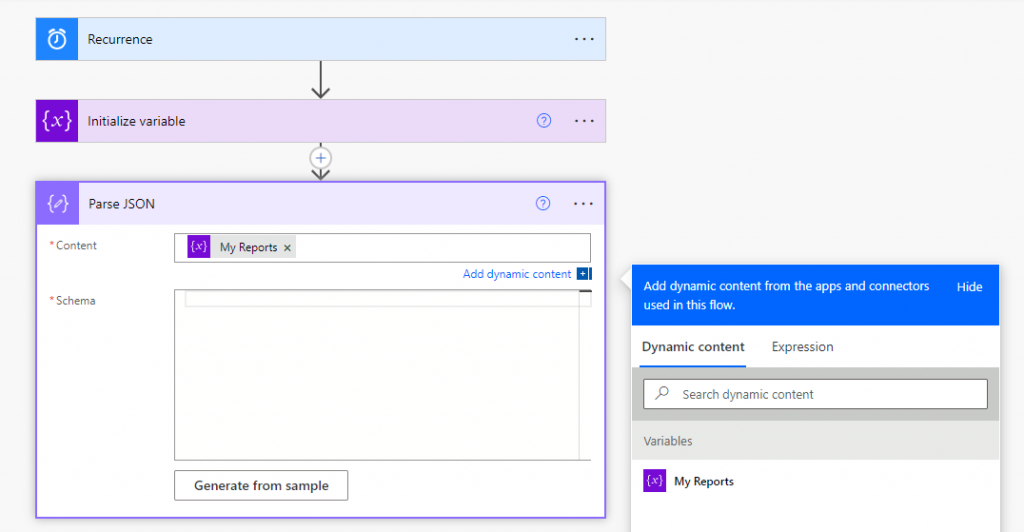
Then, click the ”Generate from sample” button and paste in the code you had copied from the previous step and click “Done.” This will automatically create the JSON schema for your variable.
Click “New step” again and search for “Post adaptive card and wait for a response.” In the Post as field, keep the “Flow bot” value. In the Post in field, choose “Chat with Flow bot.” For the Message field, paste the following:
{“type”:”AdaptiveCard“,”body”:[{“type”:”TextBlock”,”size”:”Medium”,”weight”:”Bolder”,”text”:”Weekly Check-in for ADD_TIME_FORMULA”},{“type”:”TextBlock“,”text”:”What are your priorities for this week?”,”wrap”:true},{“type”:”Input.Text”,”placeholder”:””,”id”:”priorities”,”isMultiline”:true},{“type”:”TextBlock“,”text”:”How can I help you this week?”,”wrap”:true},{“type”:”Input.Text”,”placeholder”:””,”id”:”help”,”isMultiline”:true}],”actions”:[{“type”:”Action.Submit”,”title”:”Submit“}],”$schema”:”http://adaptivecards.io/schemas/adaptive-card.json”,”version”:”1.4″}
Where the message above says “ADD_TIME_FORMULA,” replace it with the following expression by highlighting it, opening the Add dynamic content panel, clicking the Expression pivot, and typing the expression:
formatDateTime(utcNow(),’M’)
Change the Update message field to say something like “Thank you for taking the time to share this with [your name]!” and use the dynamic content panel to grab the recipient’s Email from the Parse JSON action. When you’re done, the card will look something like this, and “Apply to each” will have been automatically added to surround your action.

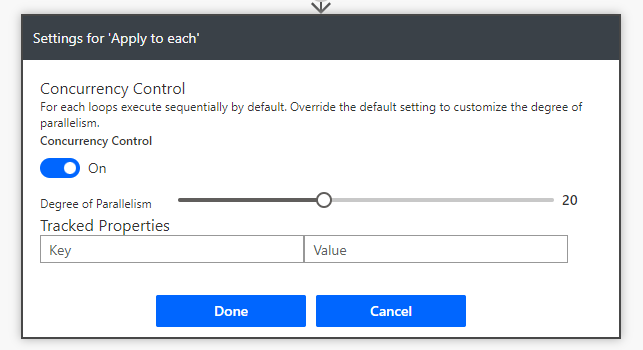
Click on the three dots of the “Apply to each” action and choose Settings. In the concurrency control settings, turn the control to “on” and set the degree of parallelism to be a number greater than your number of direct reports. Click the Done button.
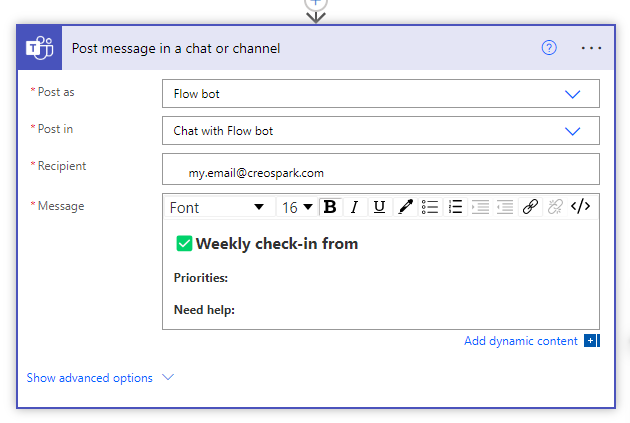
Inside the Apply to each action, click Add an action and search for “Post message in a chat or channel.” Keep the Post as “Flowbot,” and for Post in, choose “Chat with Flow bot.” For the Recipient field, put your own email from the dynamic content panel again. For Message, type and format text to look something like this: (you can grab emojis from another website such as https://getemoji.com/)
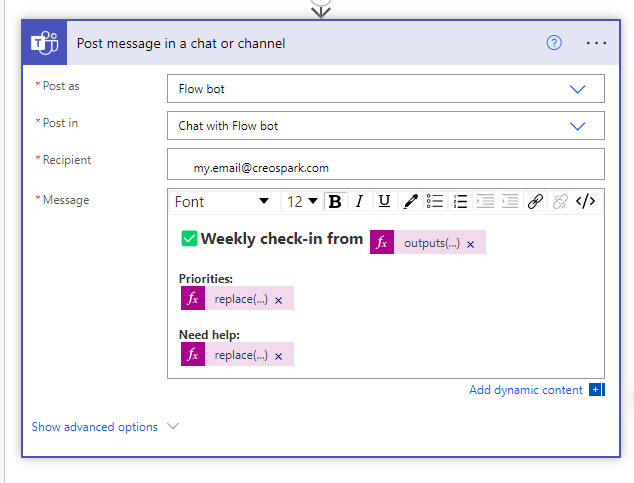
In the top line, click after “from” and add an Expression in the dynamic content panel:
outputs(‘Post_adaptive_card_and_wait_for_a_response‘)?[‘body/responder/displayName‘]
Add a new line after Priorities, uncheck the Bold text if it’s still selected, and add an Expression in the dynamic content panel, which takes the priorities response and replaces new lines with line breaks:
replace(outputs(‘Post_adaptive_card_and_wait_for_a_response‘)?[‘body/data/priorities’], decodeUriComponent(‘%0A’), ‘<br>’)
Add a new line after Need help, uncheck the Bold text button, and add an Expression to do the same with the “need help” response:
replace(outputs(‘Post_adaptive_card_and_wait_for_a_response‘)?[‘body/data/help’], decodeUriComponent(‘%0A’), ‘<br>’)
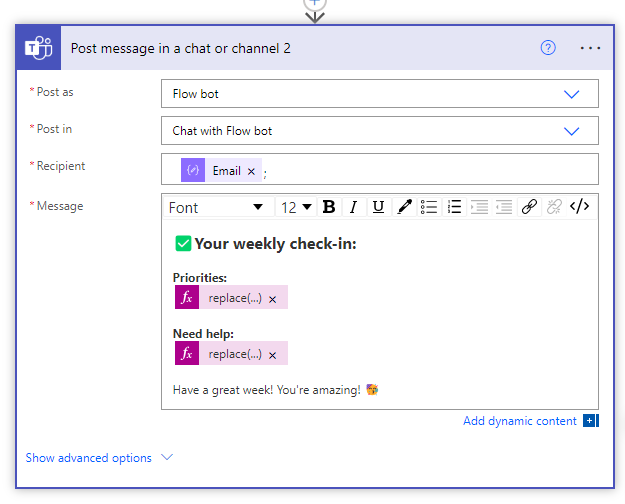
Your card will look something like this:
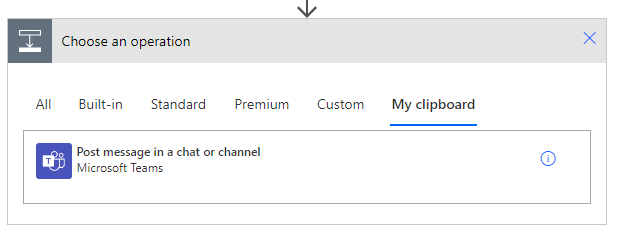
Click the three dots in the corner of that action and choose Copy to my clipboard.
Click to Add an action, click the My clipboard pivot, and choose the action you just copied.
Replace the recipient with the Parse JSON > Email field from the Dynamic content panel, and edit the text slightly since this will go back to your direct report:
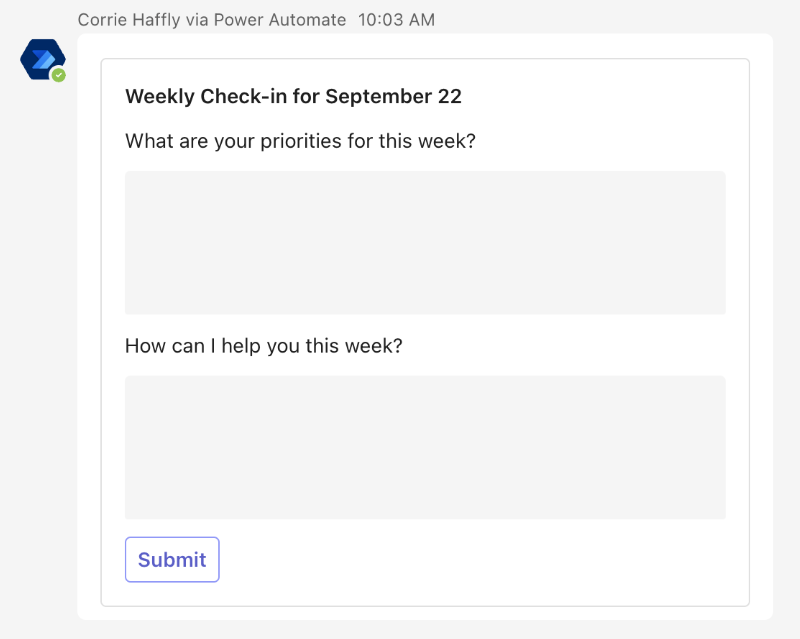
Your Flow is ready to go! Every Monday at the time you specified, your direct reports will receive a Flowbot card that looks something like this:
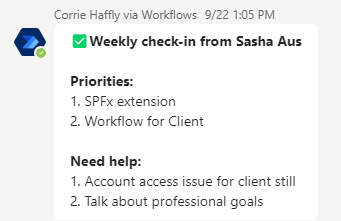
When they fill out the card, you’ll get a card like this:
By harnessing the capabilities of Power Automate weekly check-ins workflow, this automated check-in process not only streamlines communication but also acts as a catalyst for improved team dynamics. Facilitating a seamless exchange of information, it enables managers to stay closely attuned to their team members’ priorities during the holidays, fostering a more responsive and joyous team environment.