Author
ali.razmi

During this season of sunshine and warm weather, the last thing you want to be doing during your workday is searching through your inbox for that one email your boss sent you 3 weeks ago. Eliminate that struggle completely with Power Automate, automatically save email attachments to your OneDrive, and gain back some precious time for more productive work-related tasks… or weather-related tasks.
Why using Power Automate will improve productivity in your organization?
- Save time in your workday by reducing the manual intervention required to manage documentation and information from emails.
- Stay organized by storing all your files in one database. Gone are the days of bouncing between Outlook, OneDrive, and Teams to find what you want—Power Automate streamlines everything you need into one place!
- Eliminate the risk of misplaced files and human error by automating the process
Keep reading to discover 2 different ways to implement this process automation!
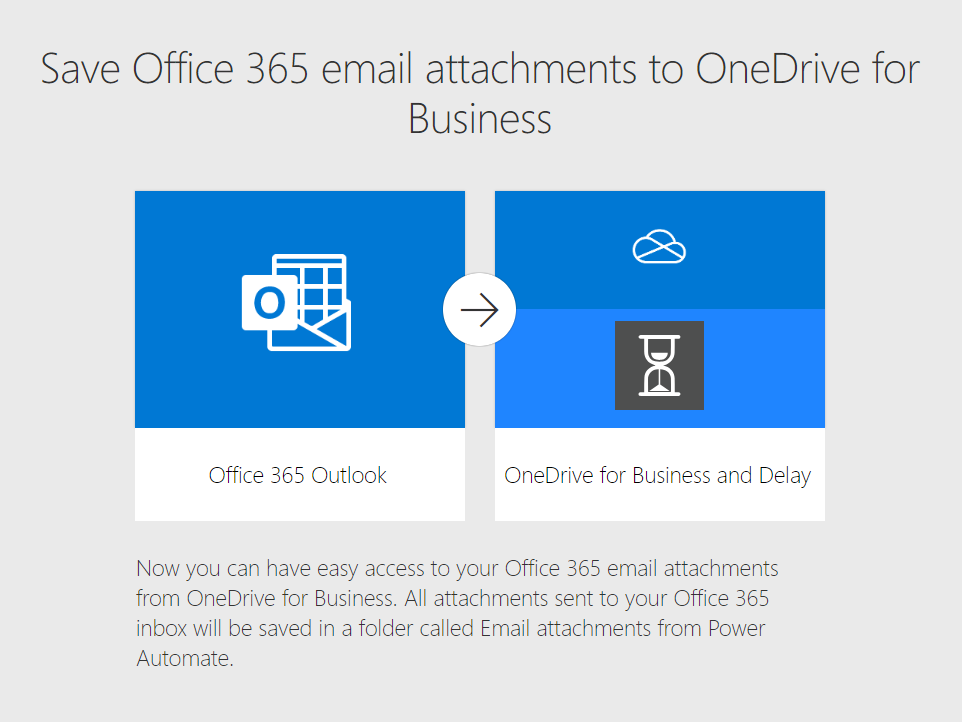
Template – “Save Office 365 email attachments to OneDrive for Business”
Navigate to “Save Office 365 email attachments to OneDrive for Business” in the Power Automate templates section, and from here, Power Automate will verify that you have a valid connection. After selecting “Create Flow,” Power Automate will present all the necessary building blocks for this flow in the background, leaving you with a new folder in your OneDrive called “Email Attachments from Power Automate.”
It’s that easy!
But the capabilities don’t end there; as you become more familiar with Power Automate, you can edit the functionalities of the template to best suit your needs.
Setting up this convenient, time-saving organizational hack only takes a few minutes!
Create a Power Automate flow to automatically save emails to OneDrive in 3 simple steps!
Step 1: Auto-trigger
To begin, set an auto-trigger to go off as an email arrives in the user’s configured inbox. Users will be able to configure actions based on a variety of options included below:
- Export email with or without email attachments
- Set folders
- User email addresses and CC’d addresses
- The importance level of the email
- Emails with a particular subject line
Power Automate will scan the email right from your inbox to your OneDrive.
Step 2: Export email as binary
At this point, you’ll want to use the message ID from the output of the auto-trigger to export your email. All that is required for this step is to paste the Message ID where you are asked.
Using the “Export Email” action allows you to export the new email as a binary.
Step 3: Create a file
The next action is to create an eml file in the configured OneDrive folder by using the “Create a file” action. Here you must fill in the Folder Path, which is the path in your OneDrive to save the email. Insert the Filename of the eml to be saved and ensure to append the filename with an extension. The file content should contain the binary output from the above action.
So there you have it! With that simple flow, you can check the configured OneDrive folder, and you will be able to find the eml file created.
Hopefully, you find this Power Automate flow useful to keep track of specific emails in separate folders for your future reference.