Author
natalie@creospark.com

Technology is evolving at a faster pace than we could ever imagine. Time and time again, innovative applications and processes are created to make our lives a little easier. The incredible web-based design tool Figma keeps pace with your team’s ideas and workflows – promoting teamwork and effective real-time collaboration between team members. You can use it to create all kinds of design work, from graphic designs and presentations to designing mobile app interfaces, social media posts, and much more.
Now, designs created in Figma can be made into an app with Microsoft Power Apps using the Create Apps from Figma UI Kit. Below, we’ve created a basic step-by-step demo, so you can start creating your own applications easily.
Part 1: create your Figma design
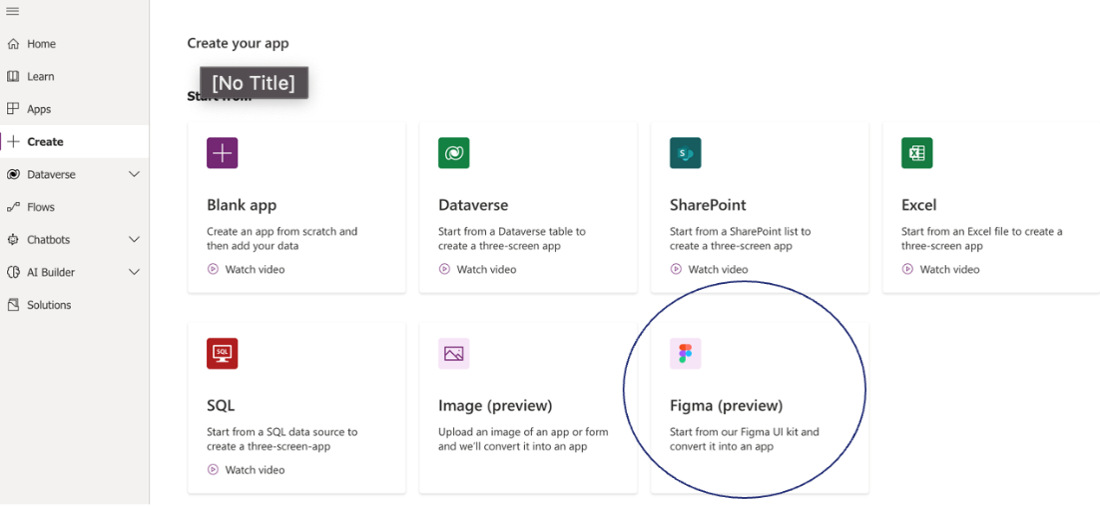
1. Navigate to the Power App Home Page and choose the Figma option at the bottom of the screen
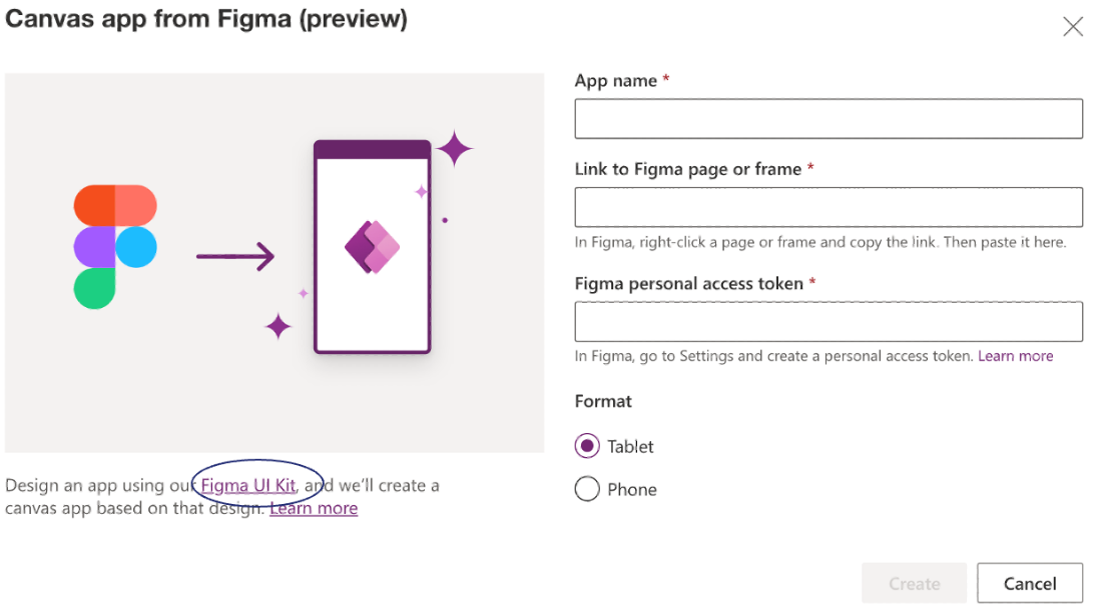
2. Once this page appears it will ask for some information (seen below), but some can be edited later since we don’t have the personal access token or link yet
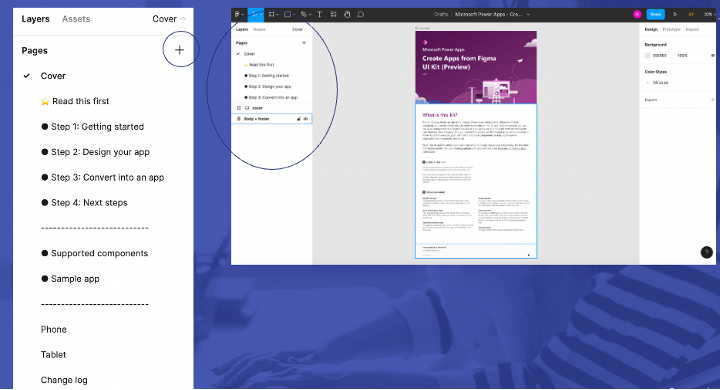
3. Click Figma UI Kit
4. Click “get a copy“ of the kit. This will then take you to Figma in your browser, or if you’re already logged in and have it on your desktop it will automatically open the kit there
5. Rename your file
6. Now for the fun part – to start designing your own app, go to create a new page
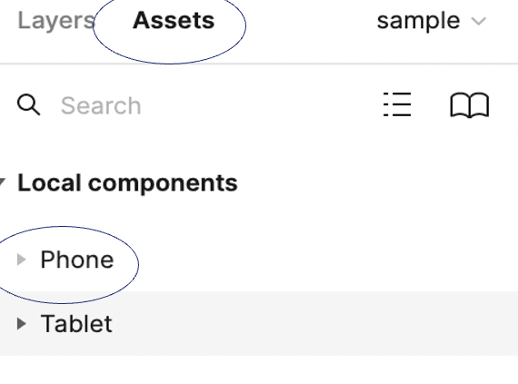
7. Go to Assets -> select component. It is important you only use sizes from the kit as only these can be easily converted into a Power App. In this case, we will go with a phone layout and create two pages
8. Select the phone-sized screen to start building out the basic UI
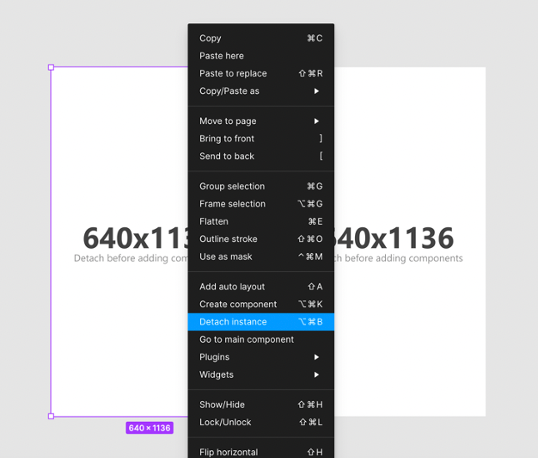
9. Before doing anything else, detach the component so that it can be uploaded to the Power App studio
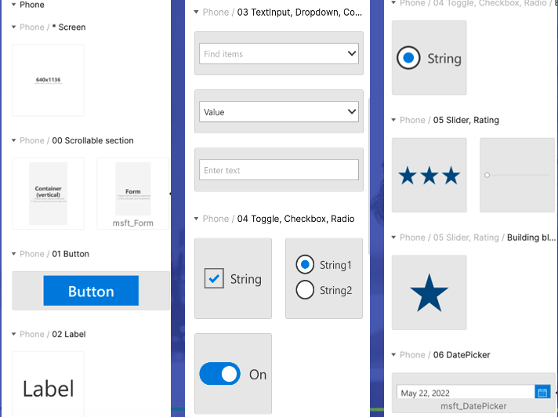
Note: These are examples of the different components you can use; we assume more will be introduced later on. Figma has a lot of creative capability, but for now, we can only work with what is compatible with Power App studio. Adding basic buttons, checking boxes, and adding star ratings are just some examples of what you can do!
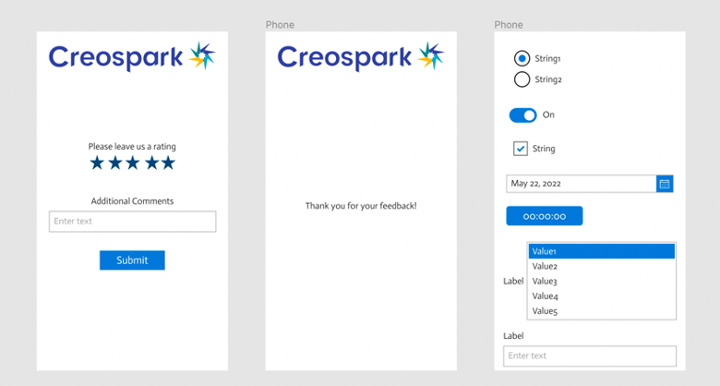
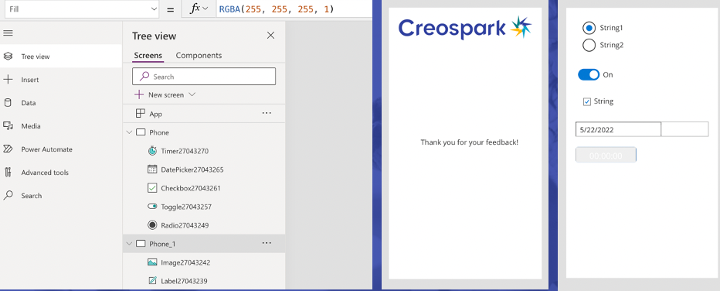
10. As you can see below, we have the basic UI for this Power App. For this demo, a feedback rating page and a thank you page were created. There is also a third page with some other components to show how they are converted when uploaded. You can add these assets in by dragging them in from the side. Now, let‘s import it into the Power App studio

Part 2: upload Figma file to Power App studio
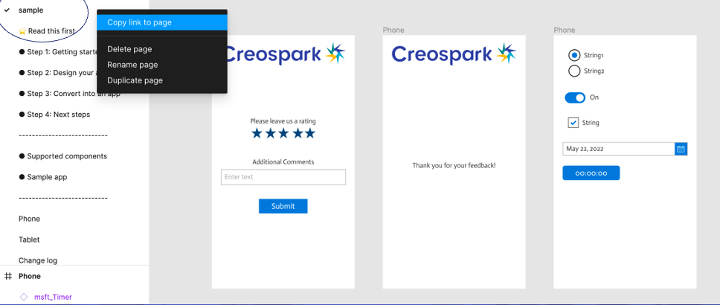
1. Click on Link to Figma page or frame. To get this link, go on sample –> copy link to page
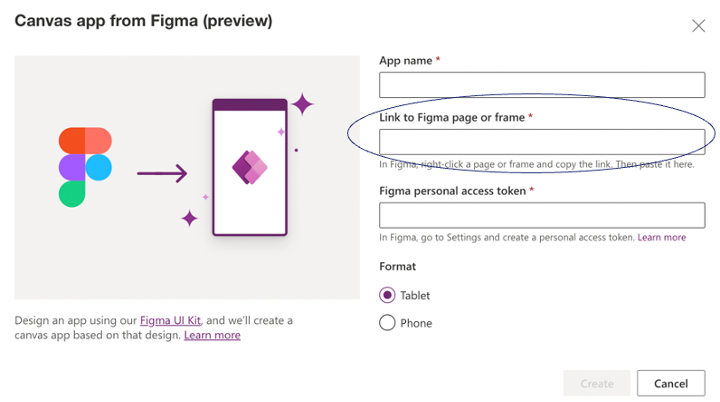
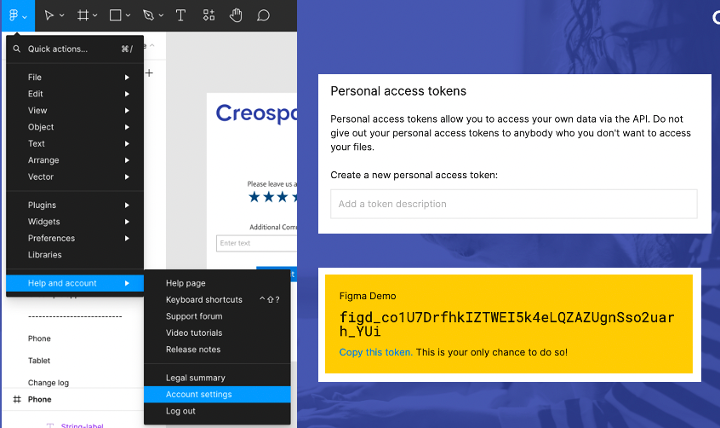
2. To get the Figma personal access token, go to Main Menu –> Help and account –> account settings and scroll to bottom
3. Type “MyFigmaTest” under create new personal access token and copy the personal access token
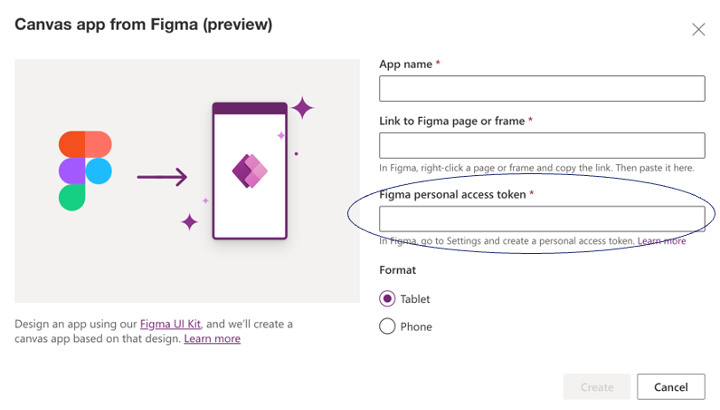
4. Go back to Power App home and select Figma
- Name of file
- Paste personal access token
- Copy and paste link to page
- Select phone, then create
5. Finally, clean up in case it does not recognize the fonts. From here, you can connect the screen and turn it into a Power App.
Another important thing to note: once the Figma design has been uploaded, any edits that you make on Figma don‘t automatically update onto Power App studio. For this, you need to make edits and then create another personal Figma access token, since it‘s only a one-time use.
See it in action in our webinar.
And that’s it! We hope you have learned how to quickly convert Figma designs into a Power App with this basic demonstration so that now you can make all your design dreams come to life.
Interested in learning more about Figma and Power Apps? Make sure to check out our newest webinar – where our branding and UI/UX experts showed us how to elevate your Power App experience without coding and gave us more insights into Figma and Power Apps, including some best practices and an in-depth live demo of a Power App design.